Materials:
The following materials are important for cleaning:
- Isopropyl alcohol or detergent
- Toothbrush (to throw away)
- Ultraviolet lamps or lots of sunny weather
- Hydrogen peroxide 35%
- Xanthan gum powder
- Vanish Oxygen Activator (or similar)
- Plastic bags, tarpaulins and plastic buckets
- Gloves (an advantage)
Working steps:
Cleaning the Amiga in 12 steps:
- Let's take the Amiga 500 apart
- Let's take a closer look at the Amiga
- Remove all keycaps, that's disgusting!
- Pre-wash, what is so dirty needs 2 washes
- Clean the keyboard bottom with a damp cloth
- Make some kind of Retrobright mixture
- Coat everything evenly with the mixture
- Do not coat the fingers!
- Wait for the sun or irradiate with ultraviolet light (UV)
- Wash everything clean!
- Reassemble
- Have fun!
Introduction:
Do you also want the good old Amiga to look a little nicer again after all these years? That it almost looks like a new device? He can! And while we're at it, a rough cleaning of the Amiga also helps, because you don't want to know what has accumulated over the years.
Some time ago I bought the following Amiga 500 on an auction platform, pleased, unpacked, a little less pleased, looked more closely, dreaded myself and finally decided to do a complete cleaning. As a foretaste, the before and after picture at the beginning:
Before:
 |
|
So how many of us know the Amiga, Braun, as always, or not? |
After:
 |
|
No, because that's how it will look after cleaning! Yes, it used to be gray, sure! |
Step 1: We unscrew the Amiga 500
Let's face it, if we take a look at the A500, it doesn't look that bad at all. It is brown, ok, but you can work with it easily. Well, then I'll teach you the horror! Because we screw this Amiga apart and take a look behind the facade, i.e. under the buttons. We leave the board outside for the time being, then there is a separate contribution for the preparation, recapping and cleaning.
|
|
The uncleaned Amiga 500 |
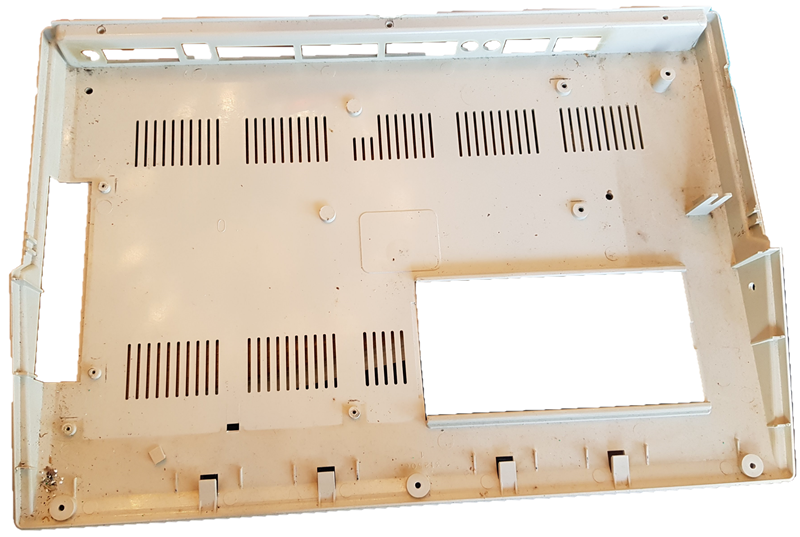
It doesn't look that bad in the case bottom. A little dirt has accumulated that can simply be sucked away. The brown color is also relatively slight on the inside. Nevertheless, we will bleach all the housing parts to get a uniform housing color.
 |
|
The uncleaned Amiga 500 case back |
A look at the memory expansion cover shows us that the previous owner probably enjoyed sipping coffee or chocolate drinks on the Amiga. For me, that's pretty gross and awful! But probably nothing yet that you can't get away with a toothbrush.
 |
|
The uncleaned Amiga 500 memory expansion lid |
Step 2: Let's take a closer look at the Amiga
So now we have removed the keyboard and take a closer look at it. Yes, yellowed, it is brownish, some dust also seems to be on the keyboard. It's no problem to continue working with this keyboard, isn't it? Sure, that's fine, but do we really want that? Because we are now getting closer ..
 |
|
The uncleaned Amiga 500 keyboard |
Oh, apparently I'm a mimosa ... After 30 years a keyboard looks a little dirtier, but that little bit ... Yes, that little bit ... What is it that actually sticks to the keys? Popel? Road dirt? Leftovers from the toilet? Cigarette smoke? Choke! So I think we have enough reasons to clean the keys ... But no, there are more reasons!
 |
|
The uncleaned Amiga 500 keyboard a bit more precise |
Apart from the fact that you can see a little more precisely what kind of siff is stuck on the keys, it looks much worse under the keys. Hair, dandruff, popel, fingernail filth ... Brrr .... I just shudder at the thought.
 |
|
Under the keys of an Amiga 500 keyboard |
What already looked amazing under the arrow keys goes even further under the other keys. Practically no millimeter has been spared from the dirt. But I see, that has not yet deterred you from reading further ... Ok, you wanted it, then let's take a look under the numeric keypad ...
 |
|
Uncleaned Amiga 500 keyboard without keys |
Promised too much? Yes, maybe, because the numeric keypad doesn't look much worse than what we've seen from the keyboard so far. So what? Yes, then let's take a look under the buttons here ...
 |
|
The number pad of an Amiga 500 keyboard |
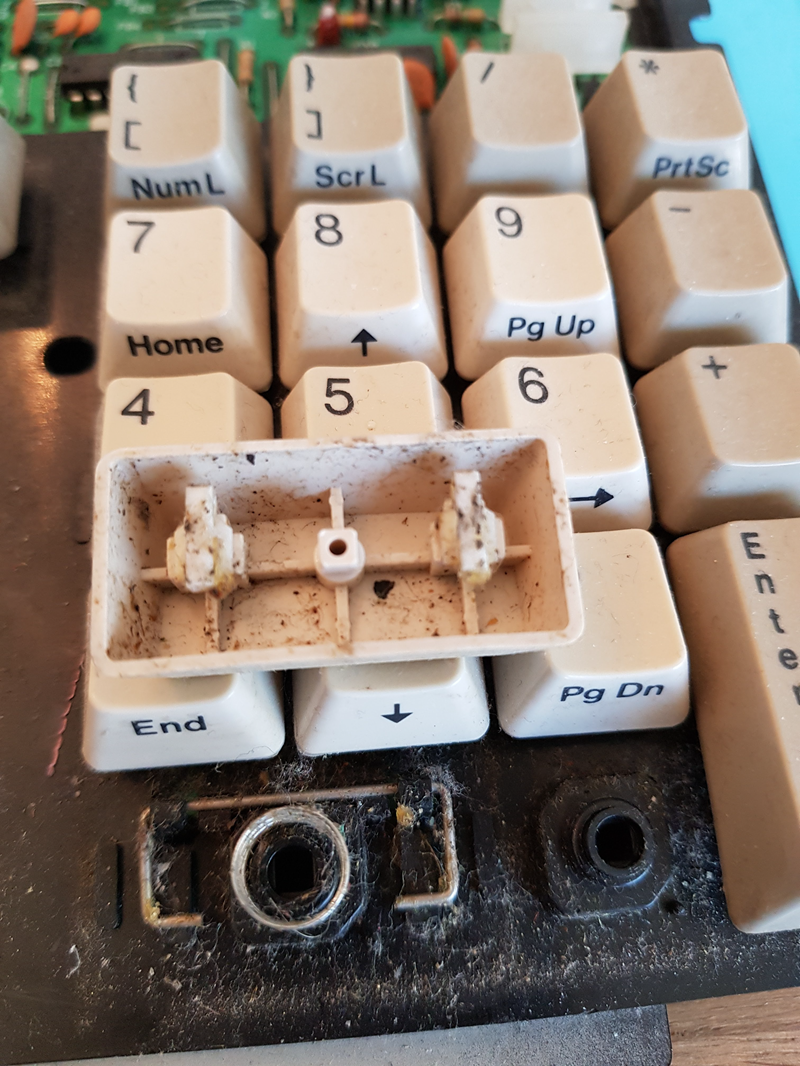
Now don't say I didn't warn you! Yeah, dirt, fungus and bacteria, even dead critters like a half-decayed fly, which was probably attracted by the smell of bacteria, lies there .. Hmm, fine! If I think I'm scratching my forehead while programming on this keyboard, then virtual pimples are growing on my face! Choke, choke, extra choke !!!
 |
|
The number pad of an Amiga 500 keyboard without a key cap |
Step 3: remove all keycaps, that's disgusting!
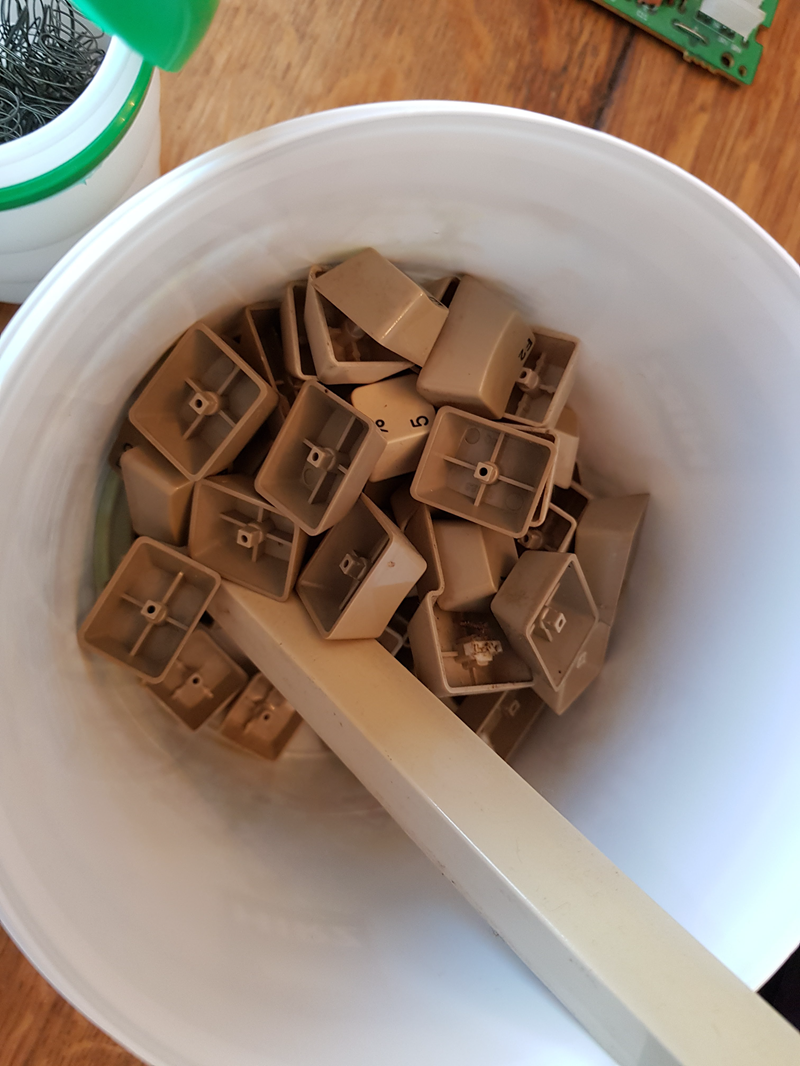
So that's definitely enough! Off with all these buttons in a cleaning bucket. Make sure that the spring underneath does not jump anywhere! There are very good tools to buy to remove it, but I just use a pair of pliers that I slide under the cap and then pry the cap off. (Do not try to grasp the cap with the pliers! This will cause hickness and scratches in the keycaps)
 |
|
Amiga 500 keycaps in the cleaning bucket |
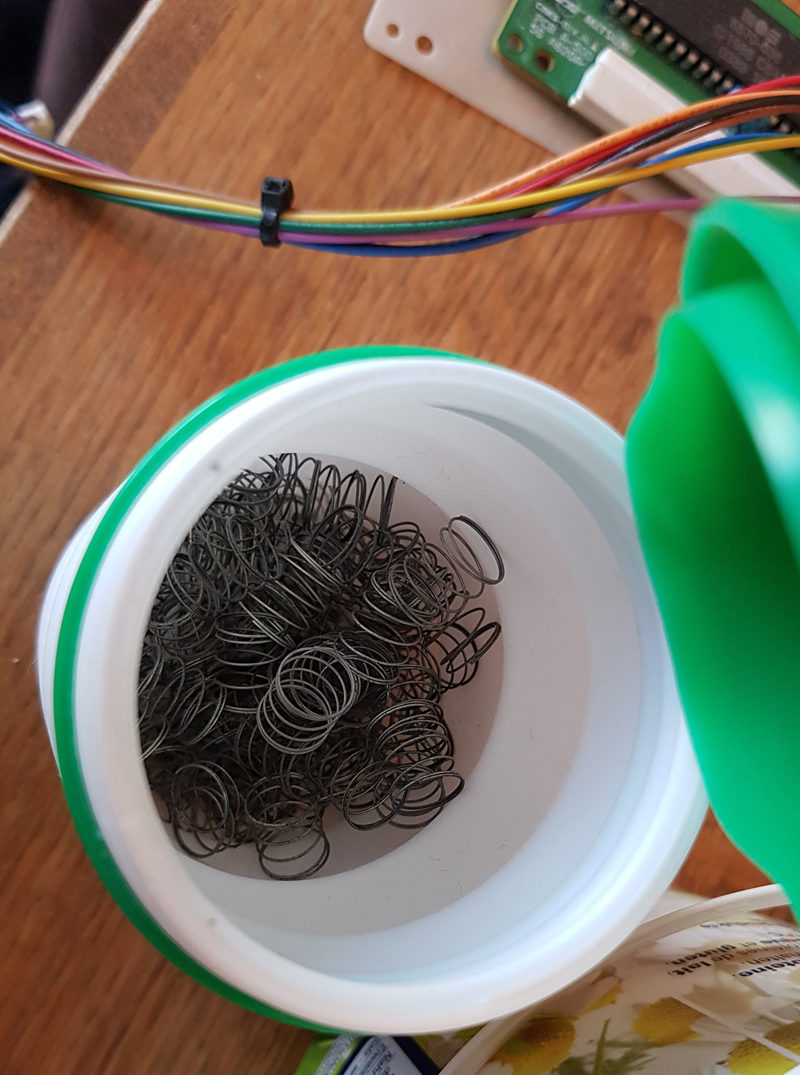
So that the springs are not lost, I like to use a small lockable box. I find chewing gum containers very practical! The gum keeps the teeth white and the empty box secures the feathers.
 |
|
Amiga 500 keyboard springs |
Step 4: Prewash, what is so dirty needs 2 washes
Put the key caps in a cleaning bucket, add a little detergent for household purposes and fill with water. Stir the whole thing a little and let simmer on a low flame. No, have fun aside! Of course not cooking! Why not? I tried it, it didn't go well, it bent all the keycaps, so it doesn't! Just let the soup stand for half an hour.
 |
|
Amiga 500 keycaps in the cleaning bucket |
After half an hour the cleaning agent has worked and the whole thing looks something like this. Do you still live in there? No idea. Pour out and rinse thoroughly with clear water and then it can be processed further.
 |
|
Amiga 500 keycaps in the cleaning bucket after half an hour |
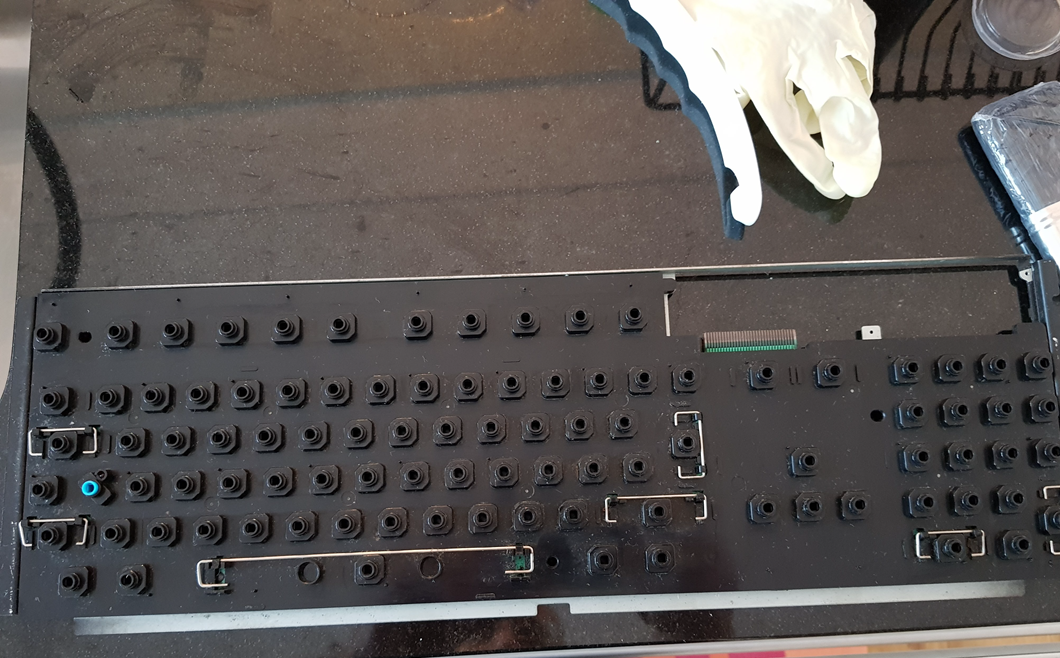
Step 5: Clean the keyboard base with a damp cloth
The bottom of the keyboard should be cleaned relatively carefully, so do not use water or cleaning agents. I used my household vacuum cleaner and used the small brush to vacuum as much as possible. The picture shows what it looks like after the vacuum cleaner. Now you can wipe off the remaining dirt with a damp cloth. Gloves (you see, I also use them) are a good help!
 |
|
Amiga 500 keyboard base |
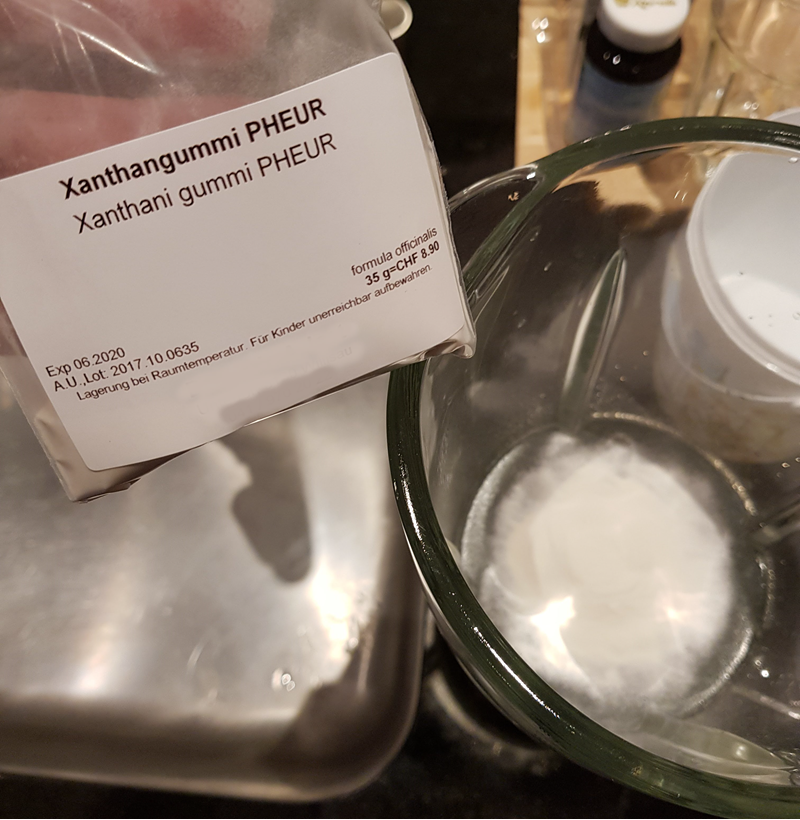
Step 6: make a kind of retrobright mix
Yeah, Retrobright is made differently, but everyone who does something has a secret recipe and everyone has the better ... It's like Cordon-Bleu, everyone knows a different restaurant that makes the best ... Anyway, I use it to make some xanthan gum. This is not really necessary, but it turns the liquid mixture into a kind of paste, which can then be applied quite well to the housing. I use about a teaspoon of heaped xanthan gum on 2 liters.
 |
|
My pseudoretrobright - xanthan gum |
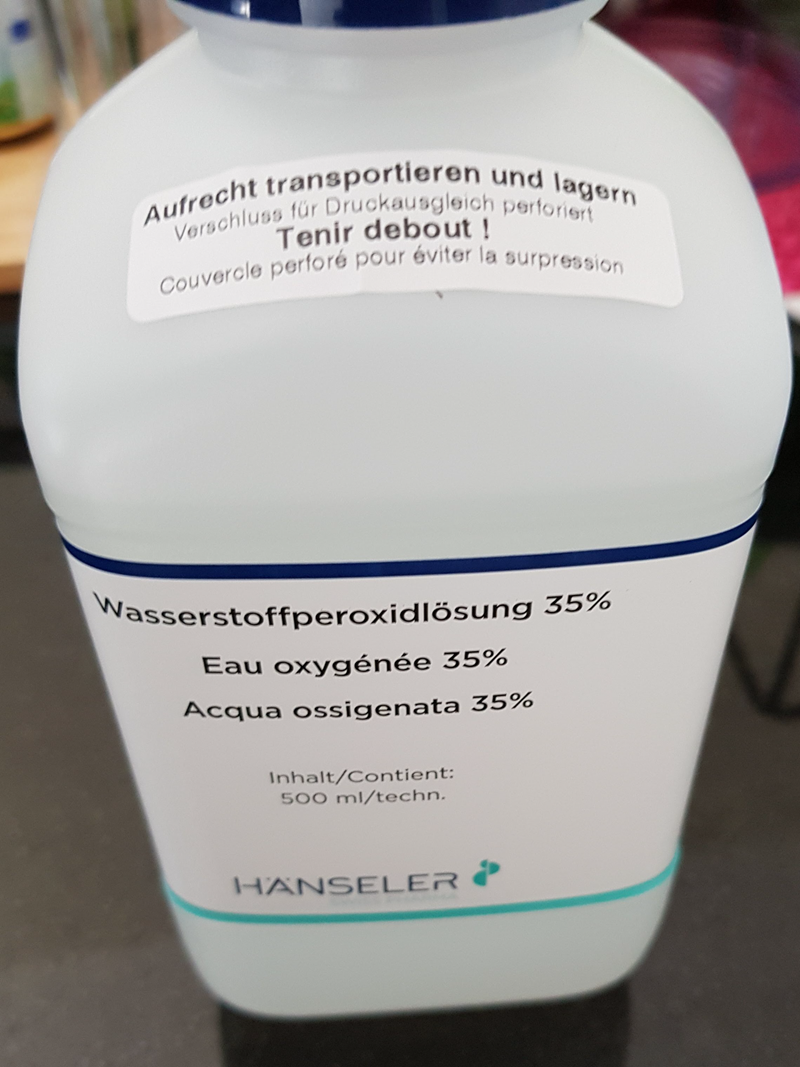
I then add hydrogen peroxide to the xanthan gum, but be careful, the stuff is caustic! The higher dosed the worse! So there are no children and animals nearby who would poke in there or even lick it off! I use hydrogen peroxide with 35%, but it should also have led to less good results ... As i said, Cordon-Bleu ...
 |
|
My pseudoretrobright - hydrogen peroxide |
My pseudoretrobright - hydrogen peroxide
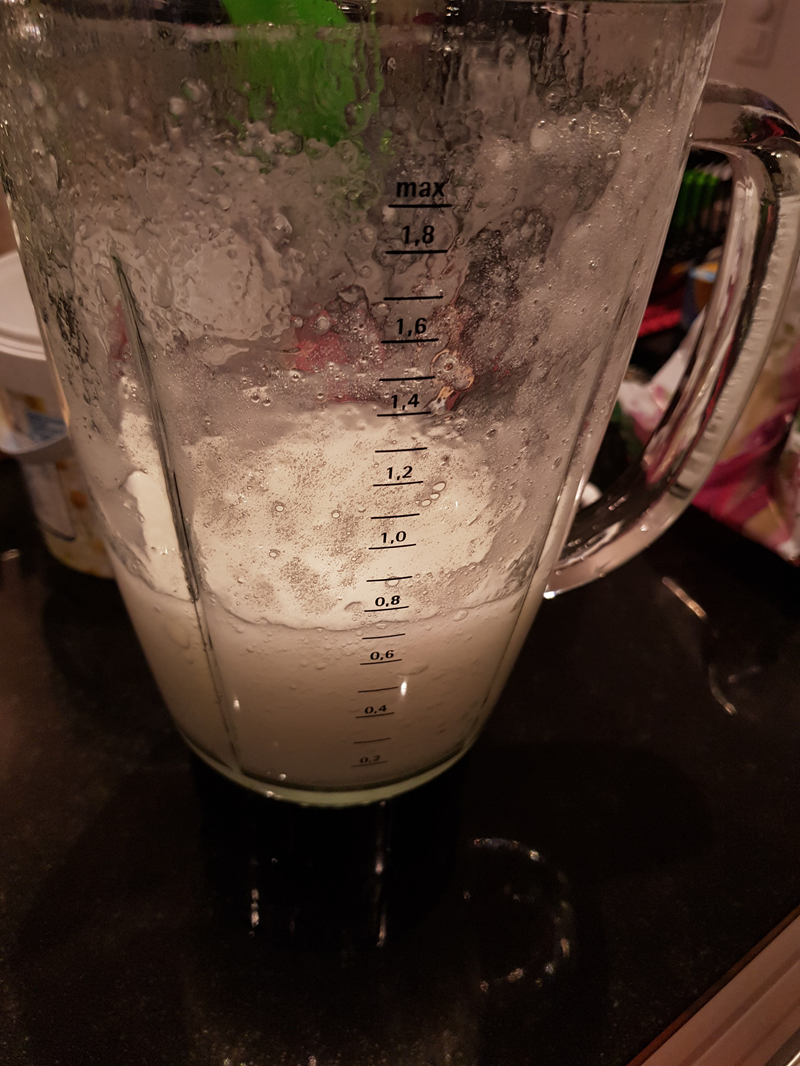
aPut the lid on the mixer (you don't want to experience the mess without a lid! Neither on you nor in the kitchen!) And off you go! Mix briefly, so 10 seconds and is good. And if I haven't said it yet, put the lid on! And don't worry about the blender. You have to wash it out, of course, but it is virtually clinically cleaned afterwards :)
 |
|
Pseudoretrobright in the mixer |
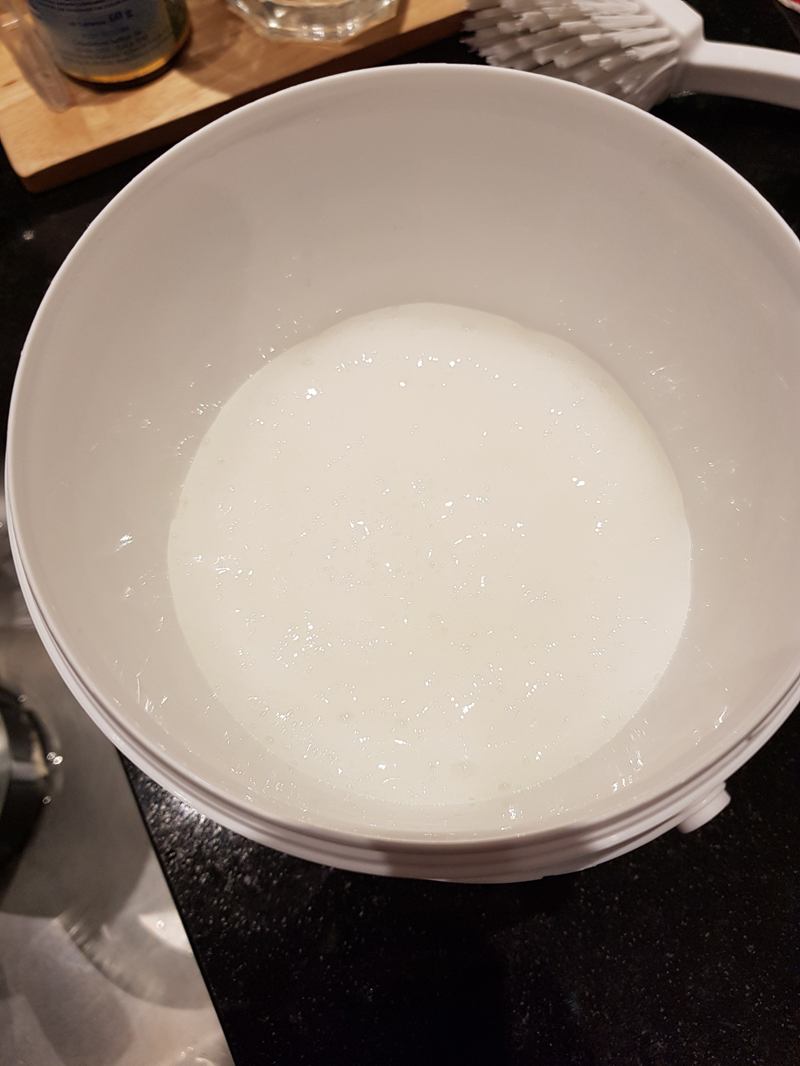
Now you can pour the pseudo fish paste retrobright mud thing into the bucket. We will paint it on the case like paint. The key caps at the end can be thrown into the bucket with the remains of the Retrobright. Just make sure that all caps are about the same in the pampe.
Now the whole thing has to be activated. To do this, you simply take a Vanish-Oxypower or something and sprinkle a teaspoon tip fully into the pamp, stir it well and it is activated. But be careful! Just a teaspoon tip! No more! Yes that is enough! Because (of course I tried it) if you take a whole teaspoon full, nothing happens at first. And then you let it take effect overnight and at some point the part starts! I had all the floor in the stairwell full of foam, and not just any foam, but a 35% hydrogen peroxide foam! So, just a tip full!
 |
|
Pseudoretrobright in the bucket |
Step 7: Coat everything with the mixture evenly
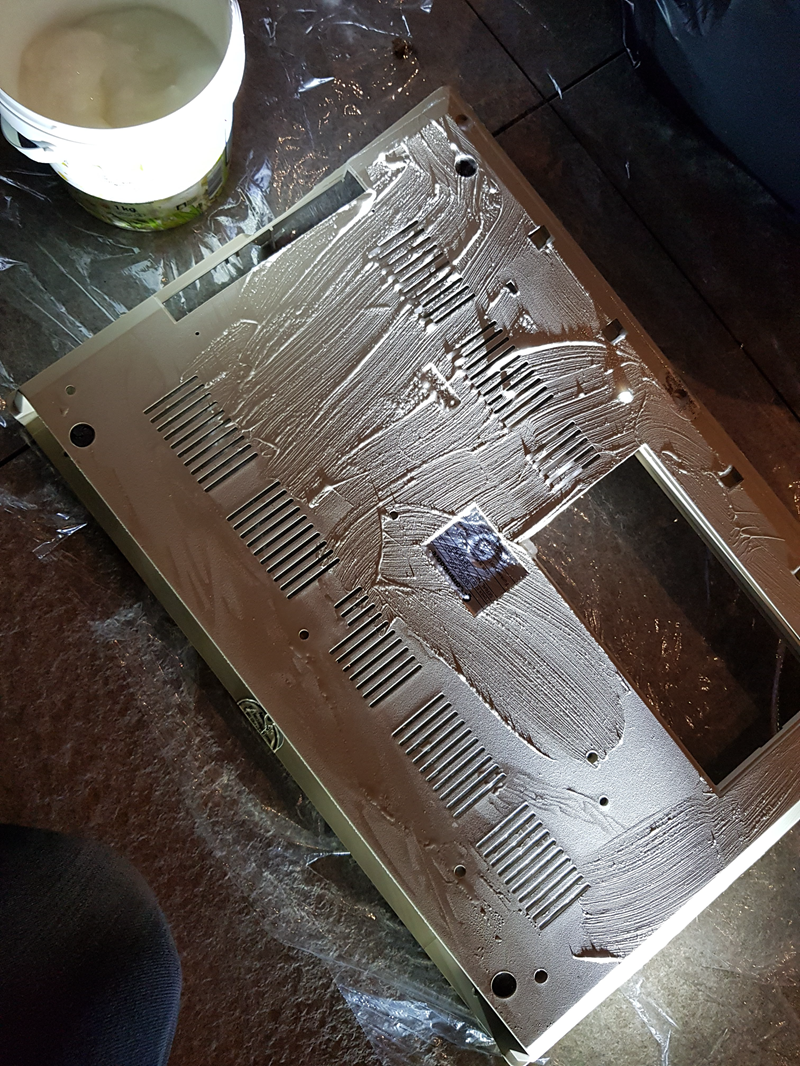
Now we take a brush and really grease the pseudoretrobright on the whole case, outside and inside. Heavily yellowed parts can really have a good layer on them. (You washed the case beforehand, right?)
 |
|
Amiga 500 case back with retrobright |
Step 8: don't brush your fingers!
When painting with Retrobright, make sure that you don't get the stuff on your fingers! You don't notice it at the beginning, but after a while it starts to burn and it leaves so beautiful white marks on your fingers. At the same time, it eats something off your finger, which makes unlocking your cell phone more difficult if you then e.g. want to call the emergency doctor. So be careful!
 |
|
Retrobright on fingers |
Step 9: wait for the sun or shine with ultraviolet light (UV)
Now all the action has to be taken and the effect of Retrobright only becomes apparent when UV light is added. So if you are in the lucky position and have sunlight, use that! Sun is the best cleaner at Retrobright! And if you are unlucky like me, you can simply use UV lamps or UV neon lamps, but that's about 20x slower. For this purpose, the housing parts coated with Retrobright are wrapped in plastic film (transparent!) And positioned so that they are evenly illuminated by UV light. Possibly turn in half time.
 |
|
Retrobright and UV lamps |
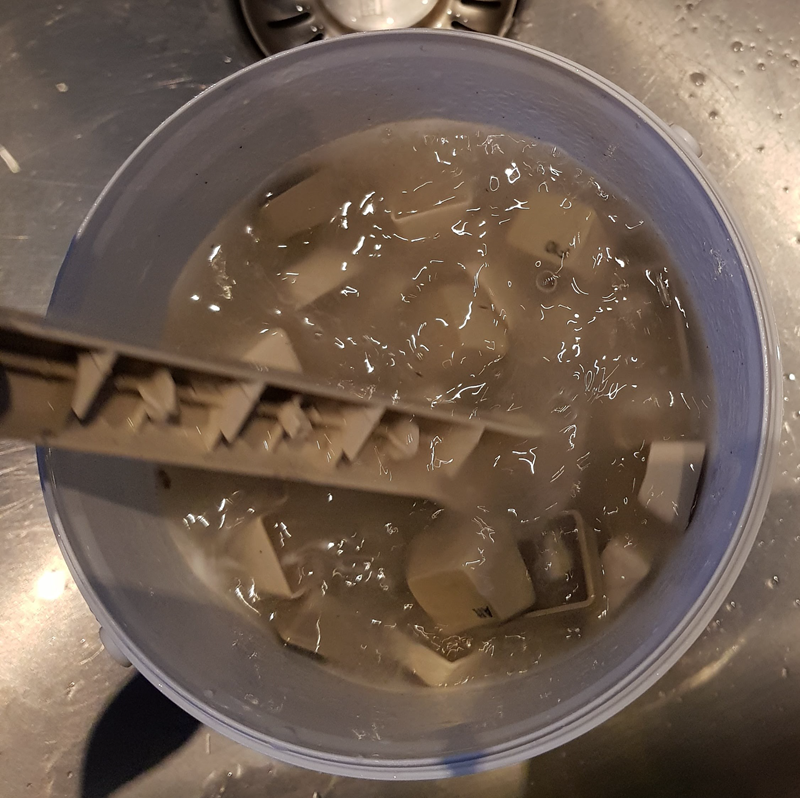
Step 10: wash everything clean!
After everything was in the sun for about 5 hours or under the UV lamp for 48 hours, it has to be cleaned again by the retrobright. This can now be done quite easily under the water, because the hydrogen peroxide has definitely lost its aggressiveness. I cleaned the keycaps directly in the bucket because the retrobright likes to get caught in the keycaps themselves.
 |
|
Amiga 500 keycaps rinsed |
I used a little dishwashing detergent here again to really get everything from the retrobright clean, because after all you always touch the buttons afterwards.
 |
|
Amiga 500 keycaps in the sink |
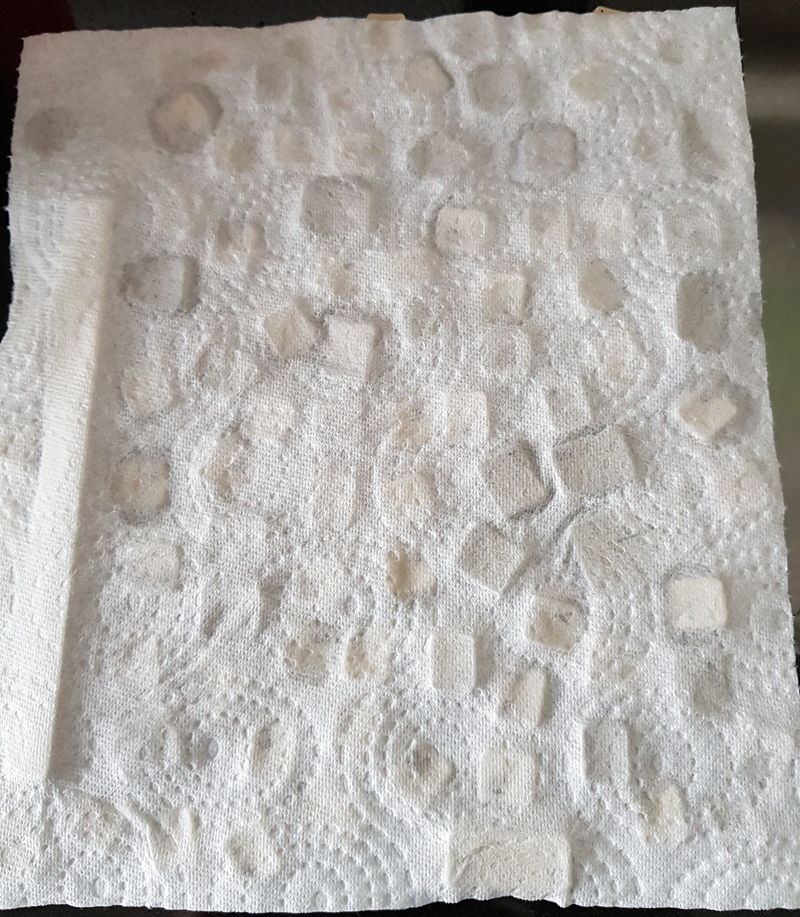
Then let the key caps dry out well. I put them on a piece of household paper and another one and leave it all for about 1 hour. It is important that the keycaps are completely dry, because afterwards they lie on a spring made of steel, which then likes to rust, which is also not nice.
 |
|
Amiga 500 keycaps in household paper |
It's pretty clear to see that the Retrobright has done its job! But you can also see that not everything that was brown is really gone. For me it was clearly due to the UV lamp, which is never as strong as the sun. Nevertheless, it still seems to have an effect after cleaning, because after 2-3 days I noticed a further brightening of the keys, even though I had already assembled and reinserted the keyboard. So there is hope, even if yours weren't very bright.
 |
|
Amiga 500 keycaps unsorted |
Here you can see it a little better that there is still bromine in the keys, or at least the brown of it. But if it looks like this, then you did it, because at this level the caps became completely bright.
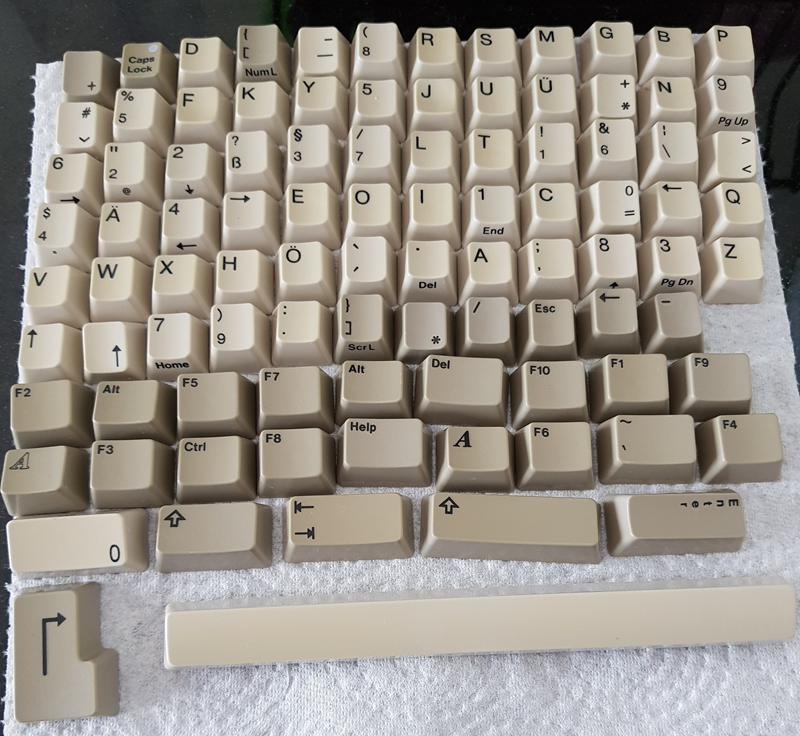 |
|
Amiga 500 keycaps somehow sorted |
Do you remember the disgusting memory expansion cover? Well, cleaned and bleached it looks like this now! Unbelievable that the part is 30 years old! Looks like new and is incredibly enjoyable if you do it yourself!
 |
|
The cleaned Amiga 500 memory expansion cover |
Step 11: reassemble
Now the keys and the springs come back on the keyboard, the board, floppy and the trim back into the housing and you're done. It is best to place the Amiga 500 somewhere where you can see it well and watch how it gets a little prettier and brighter every day!
 |
|
The cleaned Amiga 500 keyboard |
Step 12: be happy!
Well, and so you did something really great! An Amiga 500 more in the world that can be switched on again with pride, rejoices with a constant ticking of the floppy and waits for it to be fed with demos and games! And if you feel like it, you can buy another Amiga 500 and put it next to it and then proudly say, wow! Mine looks a lot cooler:)
|
|
The refreshed and cleaned Amiga 500 |